Deep links & Smart Links
What is deep links?
Deep links allow you to create a special URL. When this URL is clicked, it automatically opens the Chatty chatbox on your Shopify store page.
You can add this link to a button or a hyperlink text that you want to use as a trigger.
How does it work?
-
Go to Chatbox. In the Shared chatbox settings card, click Deep links to open it
-
Copy deep link. If you want to open tab "Order tracking" in chatbox, copy deep link of Order tracking.
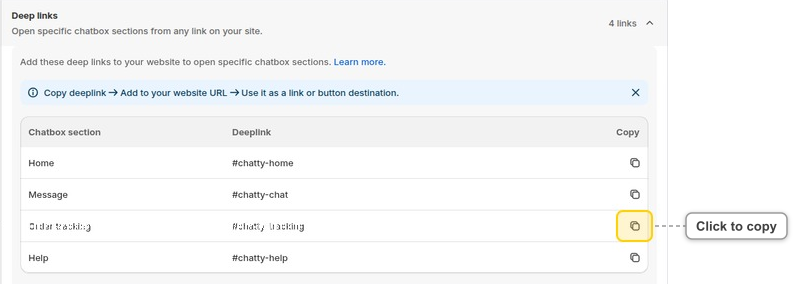
-
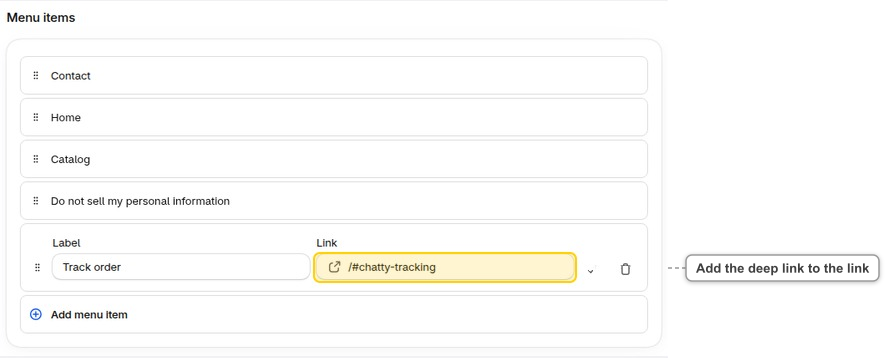
Add to your URL.

-
Add link to a button or anything on your website to use as a trigger.
For example, you can add a new button in your navigation.

To open the chat with a prefilled question or an order from an email, use a Smart link.
Smart links
Smart links open the Chatty chatbox on your store with a question already filled in. Add them to emails, store buttons, product pages or a social bio.
Order email links can also show the order in the chat. Customers can ask for help without typing the order number. A link starts a conversation about a change; it does not change the order itself.
Create a smart link
-
Go to Chatbox. In Shared chatbox settings, open Deep links.
-
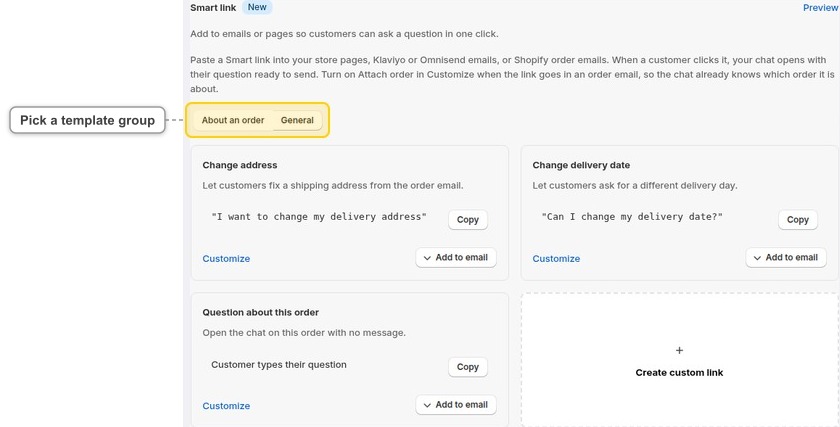
Find Smart link. Choose About an order or General.
-
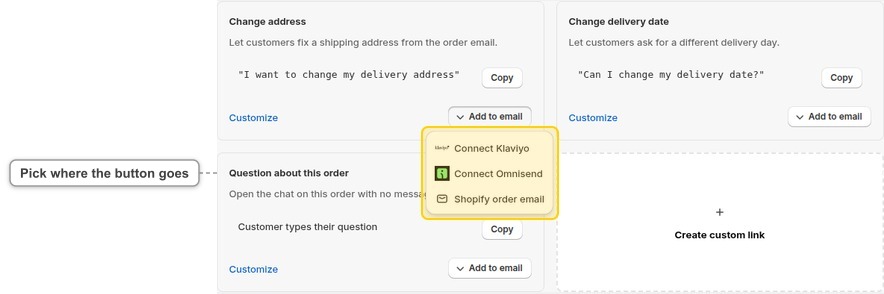
Pick a template and click Copy for a plain link. To write your own question, click Create custom link.
-
Paste the link into a button or text on your store or in an email.
Question about this order opens the chat without a prefilled question, so the customer can type their own.
Customize a link
-
Click Customize on a template.
-
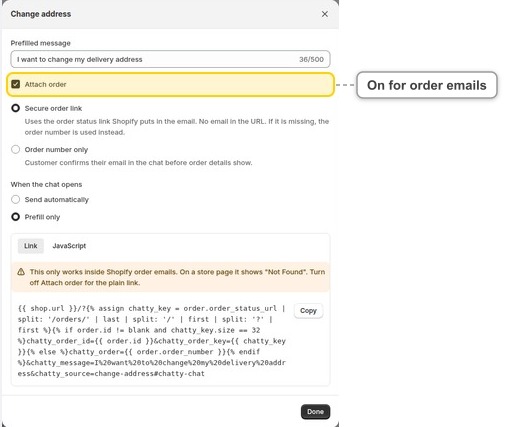
Edit Prefilled message. Use up to 500 characters, without HTML.
-
Check Attach order. It starts on for About an order templates and off for General templates. Keep it on for Shopify order emails. Turn it off for links on store pages or in general emails.
-
Under When the chat opens, choose Prefill only or Send automatically. These options show only when Prefilled message has text.
-
In the Link tab, click Copy. Click Done to close.
Prefill only is the default. Customers can edit the question before sending it. With Send automatically, the generated link includes chatty_send=1. Chatty waits for the customer's first real interaction on the store page, such as a tap or key press, before sending. An email scanner opening the link alone does not send the question or start a chat.
If your pre-chat form is required, customers must save their required information first. The automatic question is then sent once.
With Attach order, choose Secure order link to use the order ID and the key from Shopify's order status link. If that information is missing, the generated Shopify email link falls back to the order number. Order number only asks customers to confirm their order email before showing details.
The copied link with Attach order contains Shopify order variables. Use it inside Shopify order notifications, where those variables are filled in. For Klaviyo or Omnisend, use Add to email below. For store pages, turn Attach order off.
Add to Klaviyo
-
On a template, click Add to email and choose Connect Klaviyo or Add to Klaviyo.
-
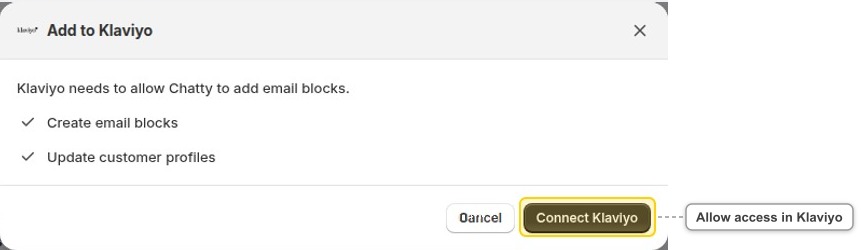
If asked, click Connect Klaviyo and allow access. Stores connected previously may see "Reconnect Klaviyo" to grant permission to create email blocks.
-
For an order template, pick "This button only" or "All 3 order buttons". Review the title, button text, question and sending option.
-
Confirm with the "Add block" button. Chatty saves it as Universal content, named "Chatty · [template name]" or "Chatty · Order help".
-
In the Klaviyo email editor, insert the saved Chatty block from your universal content.
-
Preview the email with an actual order event before sending.
Order buttons need a flow triggered by an order event containing the order ID and order status URL. A general campaign or an event without those fields cannot attach the order. Use a General template when no order data is available.
To refresh a saved block, use "Update in Klaviyo" in the Add to email menu, review it and confirm with "Update". Check emails that reuse the content after updating it.
Add to Omnisend
-
In your Omnisend account, create an API key with permission for email layouts (
email-templates.write). -
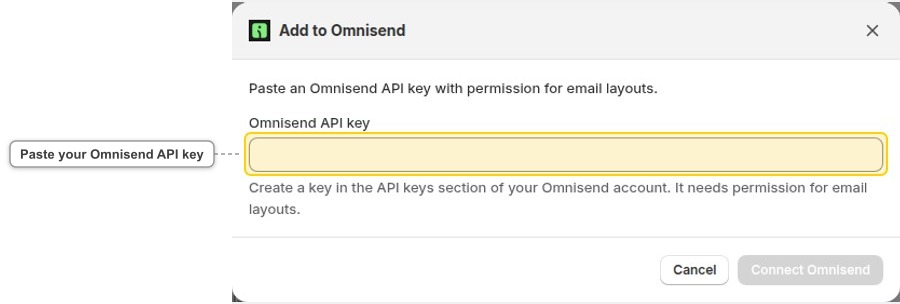
On a Chatty template, click Add to email → Connect Omnisend.
-
Paste the key into Omnisend API key and click Connect Omnisend.
-
Review the block. For order templates, pick "This button only" or "All 3 order buttons", then confirm with "Add block".
-
In the Omnisend Email builder, find the saved Chatty layout under Add elements, Saved, Layouts and insert it.
-
Preview an automation email with an actual order before sending.
Order buttons use the order ID and order status key from the automation's order data, with the order number as a fallback. Use them in automations that start from an order. Chatty does not save a separate order link on each contact.
For an existing connection, the Add to email menu shows Add to Omnisend or "Update in Omnisend". If Omnisend rejects the saved key, the menu shows "Reconnect Omnisend". Enter a key with permission for email layouts. To switch keys at any other time, use "Change API key" in the block dialog. After updating a layout, check the emails where you use it.
Add to Shopify order emails
-
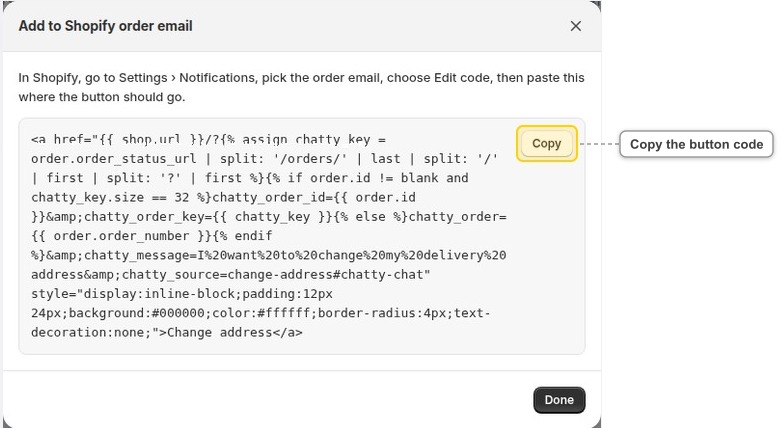
On an About an order template, click Add to email → Shopify order email.
-
Click Copy to copy the button code.
-
In Shopify, go to Settings → Notifications and select the order email.
-
Click Edit code and paste the code where the button should appear.
-
Save and preview the notification with order data.
For other email apps, use a plain copied link. Order variables generated for Shopify, Klaviyo or Omnisend are specific to that app.
Troubleshooting
| What customers see | What to check |
|---|---|
| The chat opens with the question and order | The link is working. With Prefill only, the customer still needs to send their question. |
| An email confirmation is requested | A link with only an order number needs the email used for that order. Enter it in the chat to show the details. |
| The order is not found, or the email does not match | Check the order number and order email. For email blocks, preview with the correct order event. Customers can still ask for help in the chat. |
| The store opens but the widget does not appear | Check that Chatty is enabled in the published theme and review Widget Display Rules for that page and device. |
| The email app is not connected, or a block cannot be added | Connect the app from Add to email. Reconnect Klaviyo if prompted; for Omnisend, check the API key's email layout permission. If access is restricted, ask a store admin to connect it. |
| The question waits instead of sending | Check Send automatically, interact with the store page, and complete any required pre-chat form. |
 Chatty Help Center